
New Salesforce User Account
How to make a new user account on Salesforce
Table of Contents
- Make a User Account on Salesforce
Log In to Salesforce: Open your web browser and log in to your Salesforce account using your credentials.
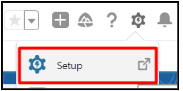
- Navigate to Setup: Once logged in, navigate to Setup by clicking gear icon and selecting Setup;
In the Quick Find box, enter Users and then select Users.
- Click New User
- Enter general information:
First Name;
- Last Name;
- Alias;
- Email;
- Username (the same as email);
- Nickname (first and last name);
- Title (also Title LT, you will find it
below);
- Company;
- Department;
- Division;
Role;
- User License;
- Profile*
*usually we use:
- Metida Sky Admin (for admins)
- Metida Sky Marketing User (for marketing people)
- Metida Sky Platform User (limited profile without CRM)
- Metida Sky User Platfrom + CRM (for general user (more features, more access) with CRM
- Fill in other information if needed, such phone, fax, etc.
Enter Mailing Address (LT Address is shown in the picture):
- Country;
- Street;
- Zip/Postal Code;
- City;
- You should add signatures using the Developer Console, and they must be in HTML format. Therefore, you should skip all HTML Signature fields and add signatures later.
Select your location settings.
Keep “Generate new password and notify user immediately” selected to notify user and send him a temporary password.
- Press ‘Save’
The user will receive an email invitation to log in to Salesforce.
- Deactivate User Account on Salesforce
Follow the steps outlined in ‘Making a User Account on Salesforce’ (steps 1.1 to 1.3);
- Choose the account you wish to deactivate.
- Click on the ‘Edit’ button.
- Deselect the ‘Active’ checkbox.
- Deactivating a user in Salesforce means that the user will not be deleted from the system but will no longer be able to log in to Salesforce and their records can be transferred to another user. They cannot be part of workflows or part of any automated processes.
- Deactivating a user will make user licenses available for use in your organization.
- Freeze User Account on Salesforce
- Follow the steps outlined in ‘Making a User Account on Salesforce’ (steps 1.1 to 1.3);
Choose the account you wish to freeze.
- Click on the ‘Freeze’ button.
- Freezing a user in Salesforce means that only stops the user from being able to log in.
- In some cases, you can’t immediately deactivate a user (such as when a user is selected in a custom hierarchy field or a user is assigned as the sole recipient of a workflow email alert). To prevent users from logging into your organization while you perform the steps to deactivate them, you can freeze user accounts.
Notice
Remember to include the new User Account in public groups and permission sets, and also don’t forget to add signatures using the Developer Console.
Add/edit signatures using Developer Console
- Log In to Salesforce: Open your web browser and log in to your Salesforce account using your credentials.
- Navigate to Developer Console: Once logged in, navigate to Developer Console by clicking gear icon and selecting Developer Console;
- Compose a query to access all users’ signatures. You can customize the query as needed based on your preferences for viewing or editing. For example:
Select id, name, HTML_Signature_EN__c, HTML_Signature_LT__c, HTML_Signature_CN__c from user
- Click on ‘Execute’ button.
- Copy the HTML code of the signature from there (If the required signature is not available, create it).
Paste the HTML code into the appropriate column. If you’re adding an English signature, paste it into the ‘HTML_signature_EN__c’ column.
- Press ‘Save Rows’
- Add User Account to Public Groups
Public groups are created for people in different departments to access email templates. When new accounts are created, they should be added to one or more public groups so that users can utilize email templates relevant to their department. For example, if someone works with Patents, they should typically be added to the ‘Patents’ group.
Public groups:
- Patents
- Law
- Marketing & Sales
- Trademarks & Design
- Navigate to Setup: navigate to ‘Setup’ by clicking gear icon and selecting ‘Setup’;
- In the Quick Find box, enter ‘Public Groups’ and then select ‘Public Groups’.
Open ‘Public group’ you need.
Click ‘Edit’ button.
- Select ‘Users’ in Search picklist.
- Select User you need.
- Click on ‘Add‘ button.
- Press ‘Save’.
- Add User Account to Groups
„Biling user group“ is made for permission to save invoices (without this group you can‘t save invoice owned by other user, if I remember that right). After creating new user, he/she should be assigned to this group.
- In the App Launcher, enter ‘Groups’ and then select ‘Groups’.
- Open ‘Billing users’ group.
In ‘Manage Members’ section find the user you need and add him/her.
- Add User Account to Permission Sets
If a new User Account will issue invoices, you need to add him/her to these permissions sets:
- Invoice Administrator (grants access to generate invoice documents)
- Invoice Issuer (Grants access to issue valid financial record number for invoice)
- Navigate to Setup: navigate to ‘Setup’ by clicking gear icon and selecting ‘Setup’;
- In the Quick Find box, enter ‘Permission Sets’ and then select ‘Permission Sets’.
Open the Permission Set you need.
Press ‘Manage Assignments’ button.
Press ‘Add Assignments’ button.
- Select User and press ‘Next’, then ‘Assign’.


